

Changing an outdoor light bulb may seem like a daunting task, But with the right tools and techniques, It can be a quick and easy job. Whether you need to replace a burnt-out bulb or upgrade to a more energy-efficient option, Knowing how to change an outdoor light bulb can save you time and money. In this guide, We will walk you through the steps to safely and effectively change your outdoor light bulb, so you can enjoy a well-lit and secure outdoor space.
Types of Outdoor Light Bulbs

There are several types of outdoor light bulbs available on the market, Each with its own unique features and benefits. Incandescent bulbs are the traditional choice and are known for their warm and natural light. However, They are not energy-efficient and have a shorter lifespan compared to other options. Halogen bulbs are an improved version of incandescent bulbs and offer brighter light and longer lifespans. Compact fluorescent bulbs (CFLs) and LED bulbs are both energy-efficient alternatives that can save you money on your electricity bill in the long run. CFLs are affordable and widely available, But they contain small amounts of mercury, Which requires proper disposal. LED bulbs are the most energy-efficient option, have a long lifespan, And come in a range of colors and brightness levels. By understanding the different types of outd.or light bulbs, You can choose the best option for your needs and preferences.
Safety Precautions
When changing an outdoor light bulb. It’s important to take some safety precautions to ensure that you avoid any potential hazards. First, turn off the power source to the light fixture by switching off the circuit breaker or removing the fuse. This will prevent any electrical shocks or accidents. Wear gloves to protect your hands from broken glass or sharp edges. Use a stable ladder or step stool to reach the light fixture, And make sure that it’s positioned on a flat and even surface. If you’re changing a high-mounted fixture, Enlist the help of another person to hold the ladder steady while you work. Finally, choose the correct type of lig.t b.lb for your fixture and make sure that it’s securely screwed in before turning the power back on. By following these safety precautions, You can change your outdoor l.ght bulb safely and with confidence.
Tools and Materials

To change an outdo.r light bulb, you’ll need a few basic tools and materials. Firstly, you’ll need a replacement bulb that’s the correct size and type for your fixture. Check the packaging or the label on the old b.lb to ensure that you choose the right one. You may also need a ladder or step stool to reach the l.ght fixture, depending on its height. Gloves can also be helpful for handling the bulb and protecting your hands. Finally, A clean cloth or rag can be useful for wiping away any dust or debris from the fixture and ensuring a secure fit for the new b.lb. By gathering these tools and materials beforehand, You can make the process of changing your outdo.r light bulb quick and efficient.
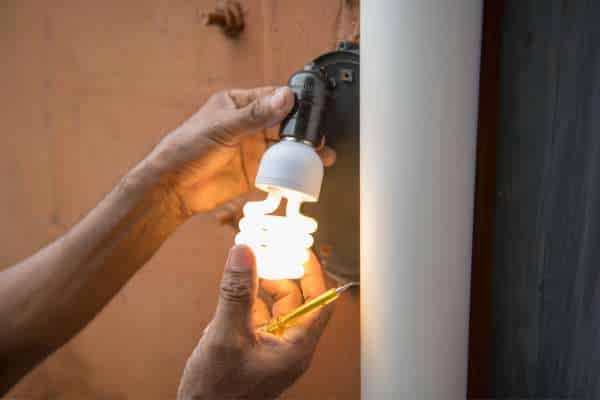
Step-by-Step Guide to Changing Outdoor Light Bulbs
Here is a step-by-step guide to changing outdoor l.ght bulbs:
- Turn off the power source to the l.ght fixture by switching off the circuit breaker or removing the fuse.
- Allow the bulb to cool down completely before attempting to remove it.
- If the bulb is stuck or difficult to remove, Use pliers or a b.lb removal tool to loosen it.
- Remove the old b.lb by gently twisting it counterclockwise and pulling it out.
- Clean the fixture with a clean cloth or rag to remove any dust or debris.
- Take the new bulb and gently insert it into the socket, Making sure that it’s securely screwed in.
- Turn the power source back on and test the light to ensure that it’s working properly.
By following these steps, You can safely and efficiently change your outd.or lig.t b.lb and enjoy a well-lit and secure outdoor space. Remember to always take the necessary safety precautions and choose the correct type of bulb for your fixture.
Troubleshooting
Check the socket for any signs of damage or corrosion, and clean it with a dry cloth or brush if necessary. By following these troubleshooting steps, you can identify and resolve issues with your outdoor light fixture and enjoy a well-lit and safe outdo.r space.
Maintenance
Regular maintenance is important to ensure that your outdo.r l.ght fixtures remain in good working order and provide reliable lighting. This can include cleaning the fixture with a dry cloth or brush to remove any dirt, dust, Or debris that may accumulate over time. It’s also important to check the wiring and connections periodically to ensure that they’re secure and in good condition. If you notice any signs of damage, such as frayed wires or corroded connections, It’s best to have them repaired or replaced by a professional electrician. Additionally, If you live in an area with harsh weather conditions, You may need to check the fixture more frequently for any signs of damage or wear. By taking the time to maintain your outd.or light fixtures, You can extend their lifespan and ensure that they provide safe and reliable l.ghting for your outd.or space.
Conclusion
Changing an outdoor light bulb can be a simple task, But it’s important to take the necessary safety precautions and have the right tools and materials on hand. Remember to turn off the power source to the li.ht fixture and allow the bulb to cool down before attempting to remove it. Use pliers or a b.lb removal tool if necessary to loosen a stuck b.lb, And make sure to choose the correct size and type of bulb for your fixture. Take the time to clean the fixture and check the wiring and connections, And don’t hesitate to consult a professional electrician if you’re unsure or uncomfortable with any aspect of the process. With a little care and attention, You can safely and efficiently change your outdoor lig.t b.lb and enjoy a well-lit and secure outdo.r space.