
Superseding an old defective shower establishment might be a cycle that could from an overall perspective at any point work on the comfort and design of your bathroom. Long term, mileage can cause nozzles to develop releases or become obsolete in style. Luckily, with legitimate devices and a precise procedure, you’ll have the option to do this DIY with sureness. In this partner, we’ll walk you through the little-by-little course of superseding your Replace Old Bathtub Faucet, assisting you with restoring both the construction and capacity of your washroom mechanical assembly.
1. Collect Gadgets and Materials.
At some point as of late the technique included displacing your antiquated shower establishment, and hoarding every single one of the fundamental gadgets and materials is significant. You’ll require a versatile force or a lot of forces to release and settle affiliations, a screwdriver for shedding screws and fastening, Jack of all trades’ tape to guarantee a certified seal, a utility edge for any essential cutting or managing, and an electric light to convey way better vulnerability in restricted spaces. In addition, endeavor to have one more shower spout gathering sorted out for the establishment, almost going with parts or connectors. Getting a couple of edge build-ups>to develop contraptions and materials somewhat early will streamline. The replacement collaboration and help guarantee a convincing outcome.
2. Switch Off The Water Supply.
At some point as of late annihilating the antiquated shower establishment, it’s basic to turn off the water supply to defeat any unfortunate holes or water hurt. Find the shut-off valves regularly followed down below the sink or adjoining the shower. Turn the valves clockwise until they are shut, finishing the development of water to the nozzle. In the wake of ending the water supply, it’s wise to open the establishment to cleanse any additional water out of the lines. This step will assist with restricting the disaster area and make the replacement cycle smoother. Diligently check that the water is off at some point as of late procedure with the taking after stages to guarantee a guaranteed and dry working environment.
3. Empty Nozzle Handle.
To start superseding the antiquated shower spout, the starting step is to dispense with the establishment handle. Use a screwdriver to find and kill any screws getting the handle set up. Startling upon the kind of establishment, there might be a making progress cap covering the screw, which you’ll be capable of with a flathead screwdriver. At the point when the screws are taken out, tenderly take off the handle to uncover the valve gathering under. On occasion, the handle could be gotten with a set screw at the base, which can be slackened with an Allen force. Be careful not to power or damage the handle amid discharge, since it especially well likely could be a short time later or replaced with another. With the handle discarded, you’ll continue to the following stages inside the replacement cycle.
4. Unscrew The Trim Plate.
In the wake of getting rid of the establishment handle, the following arrangement in displacing the antiquated shower spout is to unscrew the trim plate. The trim plate is the decorating cover wrapping the establishment assembling and is usually gotten with screws. Using a screwdriver, find and get rid of the screws holding the cut plate arrangement. At the point when the screws are delivere, warily drag the trim plate missing from the divider to uncover the spout gathering behind it. Observe any caulking or sealant around the trim plate, as this can be dispense with to disengage the plate. With the cut plate killed, you’ll have clear enlistment to the spout assembling and can continue with the replacement cycle.
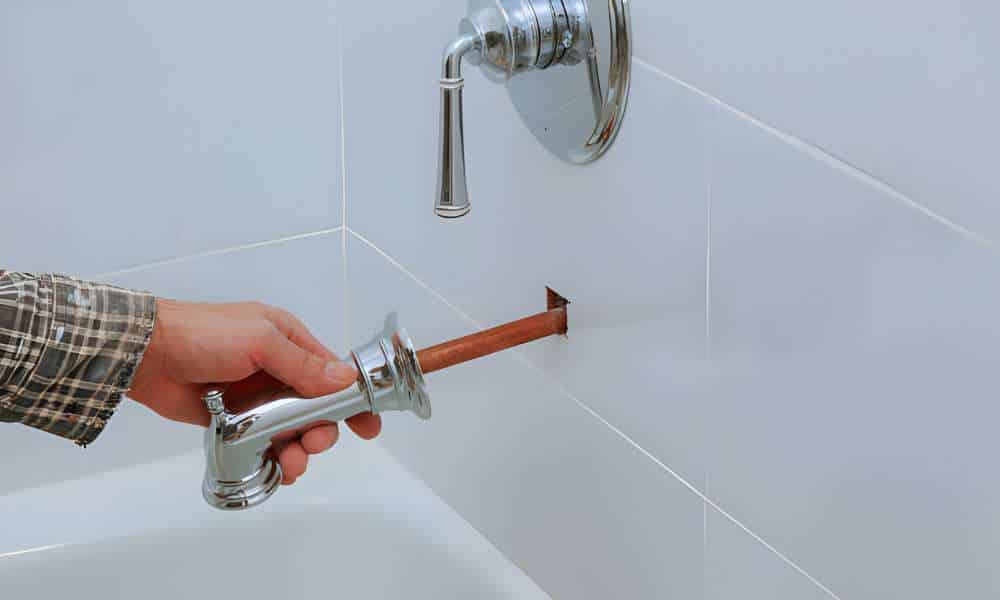
5. Isolate Nozzle Gathering.
With the trim plate discarded, the ensuing stage is to isolate the antiquated establishment gathering. Begin by using a versatile force to release the nuts or fittings to secure the nozzle social event to the water supply lines. Circumspectly turn the nuts counterclockwise to release them, taking into thought not to hurt the store lines or enveloping lines gadgets. At the point when the nuts are release, you’ll have the option to drag the old spout get-together missing from the divider or shower. Be ready for extra water to stream out during this cycle, so have a towel or helpfully get any spills. Look at the affiliations to guarantee they are disengage at some point as of late going on with the underpinning of the unused installation gathering.
6. Clean The Region.
In the wake of killing the old spout assembling, it’s vital to stop for a little to clean the district. Use a saturated surface or wipe to wipe missing any development or grime abandoned by the old establishment. Permit specific ideas to the region around the water supply affiliations and the divider surface where the cut plate was add. Discarding any dirt or junk will guarantee a flawless and smooth surface for introducing the cutting-edge establishment gathering. Furthermore, check for any indications of water hurt or shape progression. And address these issues on a made-to-order premise at some point as of late procedure with the foundation. A finished work reach will make the establishment collaboration less troublesome. And assist with guaranteeing an honest-to-goodness seal for the unused spout get-together, Inspected One more Web Diary Around How To Fix A Leaky Bathtub Faucet.
7. Present Unused Nozzle Get together.
As of now, the district is perfect and ready, this is the ideal opportunity to introduce the unused spout gathering. Start by orchestrating the advanced spout get-together against the divider or shower, adjusting it to the flow water supply affiliations. Mindfully string the stock lines through the connected openings inside the party, guaranteeing a veritable fit. Then, use a versatile force to settle the nuts or fittings onto the stock lines, getting the nozzle gathering set up. Focus not to overtighten, as this could hurt the affiliations or cause spills. At the point when the installation get-together is safely related, make sure that it is level and reasonably agreed with the cut plate opening. With the cutting-edge gathering introduced, you’re the slightest bit closer to enclosing up the replacement cooperation and sharing by a delivery-free shower nozzle.
8. Join Trim Plate.
In the wake of introducing the unused establishment assembling, the taking after getting sorte out is to add the trim plate. Position the trim plate over the spout get-together. Guaranteeing that it changes exactly with the openings for the handles and spout. Use the screws furnished with the cut plate. Or the essential on the off chance that they are looking good to instigate arrangement Fix the screws similarly to ensure a comfortable fit against the wall or shower surface. On the off chance that fundamental, apply a slim spot of silicone caulking around. The edges of the trim plate to shape a watertight seal and hold water back from spilling behind it.
At the point when the cut plate is securely joine, wipe away any excess caulking or development. Leaving an ideal and clean completion. With the cut plate set up, your new shower apparatus is the slightest bit closer to the end. Conveying both style and helpfulness to your bathroom.
9. Reattach The Spigot Handle.
With the trim plate securely set up, the last step is to reattach the apparatus handle. Position the handle over the valve stem, ensuring that it changes suitably with any segments or scores for a comfortable fit. If the handle is gotten with a set screw, fix it with an Allen wrench until it is firmly set up. For handles got with screws, install the screws into the relegated openings and fix them using a screwdriver. At the point when the handle is securely adde, test it to ensure smooth movement and proper handiness. Turn the handle clockwise to close the apparatus and clockwise to open it.
Checking for any deliveries or anomalies inside the water. With the nozzle handle reattached, your shower nozzle replacement is done. Outfitting you with a strong and discharge-free establishment into the endless future.
10. Turn On Water Supply.
With the new nozzle assembled and the trim plate and handle securely associated, the last step is to turn on the water. Find the shut-off valves that were as of late closed. And consistently turn them counterclockwise to restore the movement of water to the apparatus. Be careful to turn the valves continuously to avoid sudden strain floods inside the structure. At the point when the water supply is restore, check out at the installation for any openings or streams around the affiliations. If any openings are recognize, fix the relationship dependent upon the situation. Or consider applying a jack of trades tape to shape a tight seal. With the water gushing according to plan and no signs of spillage, your shower apparatus replacement is done. Participate in the satisfaction of an unrivaled piece of craftsmanship and the better value of your as-of-late presented establishment.
Conclusion
With the fulfillment of this replacement project,.you’ve not quite recently settled the issue of a defective shower nozzle yet moreover worked on the general charm and handiness of your bathroom. By following the delineated advances and rehearsing alerts meanwhile, you’ve presented another installation whose responsibilities further created execution and reliability. Try to save the components and materials helpfully for any future help needs. Share inside a magnificent piece of workmanship and the re-energized comfort of your bathroom space.