

Painting bedroom furniture is a creative and affordable way to refresh the look of your room without breaking the bank. Not only is this a fun DIY project, it can transform your old and outdated furniture into something new and stylish. In this article, we’ll explore the benefits of How to Paint your bedroom furniture as opposed to buying new pieces and guide you step-by-step through the entire process of painting your bedroom furniture, from furniture preparation to the final touches. We’ll cover topics such as choosing the right paint, preparing furniture, priming and painting, as well as tips for achieving a smooth and professional-looking finish. By the end of this article, you’ll have all the knowledge and skills you need to tackle your own furniture painting project and transform your bedroom.
Preparation
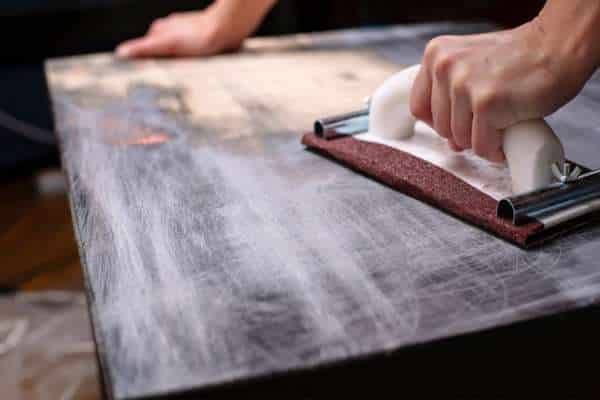
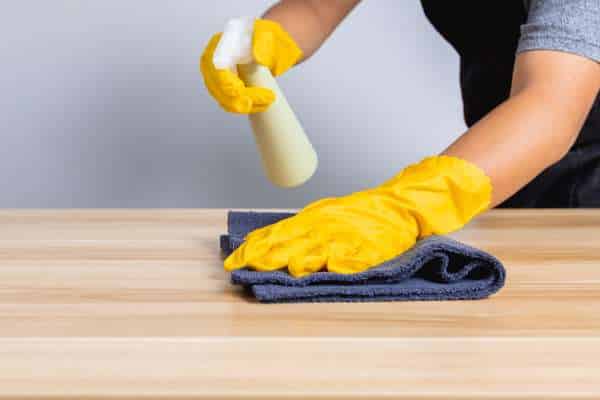
Proper preparation is the key to achieving a flawless finish when painting bedroom furniture. Before you even think about picking up a paintbrush, it’s important to prepare your furniture properly. This involves cleaning and sanding the surface to ensure that the paint adheres well and the finish looks smooth and professional.
To get started, you will need a few basic tools and materials, including sandpaper, a sanding block, a vacuum or a tack cloth, and a cleaning solution. Depending on the condition of your furniture, you may also need wood filler or putty to fill any cracks, dents, or holes in the surface.
The first step in preparing your furniture is to remove any hardware such as knobs, handles, and hinges. This will make it easier to paint the surface without getting paint on the hardware. Then, clean the surface of the furniture with a gentle cleaning solution and let it dry completely.
Next, use sandpaper to gently sand the entire surface of the Housewares. This will help the paint adhere better and ensure a smooth finish. Make sure to sand in the direction of the grain to avoid damaging the surface. If there are any dents, scratches, or other imperfections in the surface, use wood filler or putty to fill them in before sanding again.
Taking the time to properly prepare your furniture before painting is essential to achieving a professional-looking finish. With the right tools and materials, and a little bit of patience, you can transform your old and tired bedroom furniture into something new and stylish.
Choosing the Right Paint

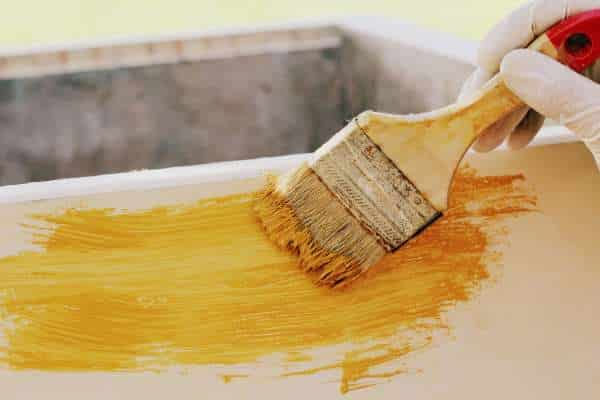
Choosing the right paint is crucial when painting bedroom furniture. There are several different types of paint that are suitable for Housewares, including latex, oil-based, And chalk paint. Latex paint is easy to use, dries quickly, And is low in odor. Oil-based paint is more durable, but takes longer to dry and has a stronger odor. Chalk paint is a popular choice for furniture painting as it provides a vintage, shabby-chic look.
When selecting the color and finish of the paint, consider the overall decor and color scheme of your bedroom. If you want to create a cohesive look, choose a color that complements your bedding, curtains, And other accessories in the room. Additionally, the finish of the paint can also impact the final look of your furniture. A glossy finish can create a modern and sleek look, while a matte finish can provide a more subtle and understated look.
It’s important to ensure that you purchase enough paint for the project. The amount of paint needed will depend on the size of the Housewares piece, the type of paint used, And the number of coats applied. As a general rule of thumb, you will need one quart of paint for every two to three medium-sized pieces of furniture.
Priming the Furniture

Priming is an essential step in the furniture painting process that should not be skipped. Primer acts as a bonding agent between the surface of the Housewares and the paint, Ensuring that the paint adheres well and lasts longer. It also helps to cover any stains or imperfections in the surface, resulting in a smoother finish.
Before applying primer, make sure that the Housewares are clean and dry. Use a brush or roller to apply a thin, Even coat of primer to the entire surface of the Housewares. If you are using an oil-based primer, make sure to use a natural bristle brush. For water-based primers, A synthetic brush or roller will work fine.
When choosing the right primer for your furniture, consider the type of surface you will be painting. If the Housewares are made of wood, Use a wood primer. If the surface has been previously painted or stained, Use a primer specifically designed for that surface. There are also specialty primers available for surfaces such as metal or plastic.
It’s important to let the primer dry completely before applying the paint. Follow the manufacturer’s instructions for drying times, but generally, it will take about 24 hours for the primer to dry completely.
Applying a Second Coat
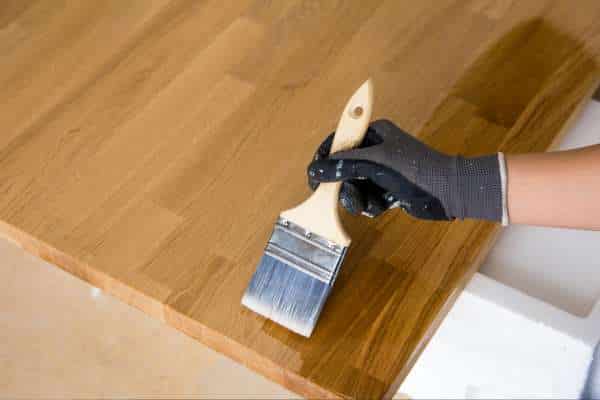
Applying a second coat of paint is an important step in achieving a professional-looking finish when painting bedroom furniture. The second coat helps to even out the color and provide better coverage, resulting in a more polished look.
To apply the second coat, make sure that the first coat is completely dry. If you try to apply the second coat before the first coat is dry, you may end up with drips or runs in the paint. Use a brush or roller to apply a thin, even coat of paint to the furniture. Be sure to follow the manufacturer’s instructions for drying times between coats.
To avoid drips and runs, Use a light touch when applying the paint. Avoid overloading the brush or roller with too much paint, And apply the paint in thin, even strokes. If you do notice drips or runs in the paint, Use a clean, dry brush to gently smooth them out.
It’s important to let the second coat dry completely before using the Housewares. Follow the manufacturer’s instructions for drying times, but generally, it will take about 24 hours for the paint to dry completely.
Allowing the Furniture to Dry

Allowing the furniture to dry completely is crucial in achieving a long-lasting and durable finish when painting bedroom furniture. Rushing the drying process can lead to smudging, smearing, And even peeling of the paint.
Before using the Housewares, make sure that the paint is completely dry. Follow the manufacturer’s instructions for drying times, but generally, it’s best to let the paint dry for at least 24 hours before using the Housewares. If the humidity is high, it may take longer for the paint to dry.
While the furniture is drying, it’s important to protect the painted surface from any damage. Avoid placing any objects on the Housewares or touching it with your hands or fingers. You can also cover the Housewares with a clean cloth or plastic sheet to protect it from dust, dirt, And other debris.
Sanding and Buffing
Sanding and buffing the furniture after painting is a crucial step in achieving a smooth, polished finish. will help to smooth out any rough spots or imperfections in the painted surface, While buffing will add a shiny finish to the Housewares.
To sand the furniture, Use a fine-grit sandpaper and gently sand the entire surface of the Housewares. Make sure to sand in the direction of the grain, And avoid applying too much pressure, Which could damage the painted surface.
Once the sanding is complete, buff the Housewares using a soft cloth or buffing pad. Apply a small amount of wax or polish to the cloth or pad and gently rub it onto the Housewares in circular motions. Buff the surface until it shines.
When sanding and buffing the furniture, it’s important to be gentle and avoid applying too much pressure, Which could damage the painted surface. Use a light touch and take your time to achieve a smooth and polished finish.
Touch-Ups and Repairs

Even with the best efforts to create a perfect paint job, there may be areas that need touch-ups or repairs. Touching up the paint is a simple process that can be done with a small paintbrush and a steady hand. Simply apply a small amount of paint to the area that needs to be touched up, And blend it in with the surrounding area.
If there is damage to the painted surface, such as chipping or scratching, it’s important to repair it as soon as possible to prevent further damage. To repair the surface, first clean the damaged area with a mild soap and water. Next, sand the damaged area with a fine-grit sandpaper, And apply a small amount of wood filler if needed. Once the filler is dry, sand the surface again and apply a coat of primer followed by a coat of paint.
To maintain the appearance of the furniture over time, it’s important to take care of it properly. Avoid placing objects on the Housewares that could scratch or damage the painted surface, And clean it regularly with a soft cloth and mild soap and water. If necessary, touch up any areas that show signs of wear and tear to keep the furniture looking its best.
Adding Decorative Touches
After painting the furniture, Adding decorative touches can add a personal and unique touch to the piece. One option is to use stencils to create a pattern or design on the Housewares . Stencils can be purchased at most craft stores and come in a variety of designs and sizes. Simply place the stencil on the Housewares and use a small paintbrush to fill in the design with paint.
Another option is to add decals or other embellishments to the Housewares. Decals come in a variety of designs, Including floral patterns, geometric shapes, And animal prints. They can be applied to the Housewares using a simple adhesive backing and can be easily removed if desired.
When choosing decorative touches for the Housewares, it’s important to consider the overall style and theme of the room. Choose designs and colors that complement the existing decor and add to the overall aesthetic of the space.
Cleaning Up
After completing the painting project, It’s important to properly clean up the work area and dispose of any leftover materials or waste. Begin by wiping down any surfaces that were used during the project, Including the furniture, tools, And workspace. Use a damp cloth to remove any dust or debris.
Next, dispose of any leftover materials or waste in a responsible manner. Pour any remaining paint back into its original container and seal it tightly. Recycle any empty paint cans or other materials that can be recycled. Dispose of any hazardous waste, such as paint thinner or brushes with oil-based paint, According to local regulations.
Finally, properly store any leftover paint or tools. Seal the paint container tightly and store it in a cool, dry place away from heat sources and direct sunlight. Clean and dry any brushes or tools used during the project and store them in a safe place where they won’t be damaged.
Caring for Painted Furniture

To keep your painted bedroom furniture looking its best, it’s important to care for it properly. Start by avoiding any activities that could damage the painted surface, such as dragging heavy objects or placing hot items directly on the Housewares.
When cleaning the furniture, use a soft cloth or sponge and mild soap and water to avoid damaging the paint. Avoid using harsh chemicals or abrasive cleaners that could scratch or discolor the painted surface. For tougher stains or dirt buildup, try using a mixture of baking soda and water or a specialized Housewares cleaner recommended for painted surfaces.
To protect the painted surface from scratches or dings, consider using coasters or placemats under glasses and plates. Use felt pads on the bottom of Housewares legs to avoid scratching hardwood floors. And when moving the furniture, be sure to lift it rather than dragging it across the floor.
By following these simple tips for caring for your painted bedroom furniture, you can keep it looking beautiful for years to come. With a little bit of maintenance and care, your newly painted Housewares can be a stylish and functional addition to your home.
Frequently Asked Questions
As with any home improvement project, painting bedroom furniture can come with its own set of questions and concerns. Here are a few frequently asked questions and tips for troubleshooting common issues:
Q: Can I paint over a previously painted or varnished surface?
A: Yes, but you will need to properly prepare the surface by cleaning and sanding it. Consider using a primer designed for use on previously painted or varnished surfaces to ensure good adhesion.
Q: How long does it take for painted furniture to dry?
A: Drying times can vary depending on factors such as humidity and temperature, but it’s generally a good idea to let the Housewares dry for at least 24 hours before using it. For best results, wait 48-72 hours before subjecting the Housewares to heavy use.
Q: How can I avoid drips and runs when painting?
A: Use a quality brush or roller and apply thin coats of paint, allowing each coat to dry before applying the next. Avoid overloading the brush or roller with paint and be sure to smooth out any drips or runs as you go.
For first-time DIY painters, it’s important to take your time and follow the steps carefully. Consider practicing on a small, less visible piece of Housewares before tackling a larger project. And don’t be afraid to ask for help or advice from more experienced DIYers or paint professionals. With a little bit of patience and practice, you can achieve a beautiful painted finish on your bedroom furniture.
conclusion
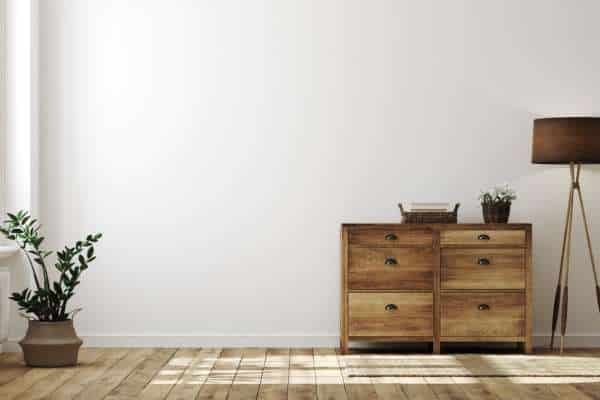
In conclusion, painting your bedroom furniture is a fantastic way to refresh the look of your space without breaking the bank. With a little bit of time and effort, you can transform old or outdated Housewares into a stunning focal point in your bedroom. The benefits of painting Housewares versus buying new pieces are numerous, including the ability to customize the color and finish, saving money, and reducing waste.
In this article, we’ve covered the essential steps for painting bedroom furniture, from preparation and selecting the right paint to applying a second coat and adding decorative touches. We’ve also discussed the importance of proper care and maintenance to keep your painted Housewares looking its best.
If you’re new to DIY projects or painting Housewares, don’t be intimidated. With the right tools, materials, and techniques, anyone can successfully paint their own Housewares. Take your time, follow the steps outlined in this article, and don’t be afraid to ask for help if you need it.
So, go ahead and give your bedroom furniture decorating a new lease on life with a fresh coat of paint. You’ll be amazed at the difference it can make